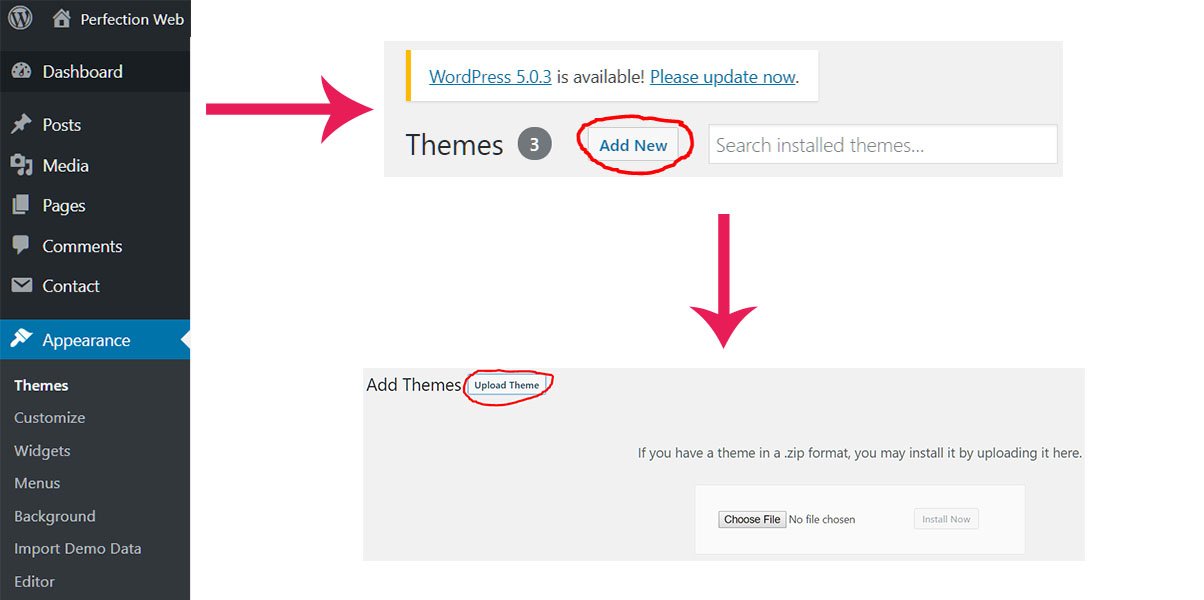
Today I will teach you how to install a purchased theme on your WordPress.
On themeforest, theme installation offered by support team usually costs US$50! I would say it’s a rip-off once you’ve learnt how to do it from this article.
Here we go 🙂
STEP 1 – Open up your localhost directory to your website, or, navigate to http://yourdomain.com/wp-admin.
STEP 2 – Login to your account. STEP 3 – On the left side bar of your WP admin panel, choose Apperance -> Themes -> Add New -> Upload Theme.

STEP 4 – A common error that a beginner would have made is directly dragging in the whole .zip file he just downloaded. That is wrong! You need to unzip the file, and find the actual theme.zip file along with other Documentation, Licensing, Resources folders under the same directory under the root directory.

STEP 5 – Drag the .zip file above onto the upload section, wait for few seconds and you are done installing the theme!
Notes: Sometimes the file size is exceeding over the max uploading size. The most effective way is to alter your .htaccess file, paste the following code into your .htaccess file:
php_value upload_max_filesize 512M php_value post_max_size 512M php_value max_execution_time 300 php_value max_input_time 300
STEP 6 – Go to Apperance -> Themes again, you will see your theme thumbnail is right there! Click Theme Details -> install Plugins.

STEP 7 – After installing the plugins, most templates import demo with One Click Demo Import plugin. You can find the import button among those buttons in the above picture. However, there are some other templates having import demo button configured in their own theme function. You can usually find a stand-alone Theme Options section in your admin panel, or somewhere within apperance -> theme settings. I hope this tutorial can save you 50 bucks 🙂 If you have more questions, feel free to leave a message in perfectionwebsydney@gmail.com. I will answer you ASAP. Thanks for reading.
